Over 1 billion emails are sent through MailChimp every day. This number alone speaks volume of the market reach that this email marketing solution provider enjoys.
Personally, I have loved MailChimp since forever. And there are plenty of reasons why.
Not that the likes of AWeber, GetResponse, and Constant Contact aren’t good enough. They are good.
But MailChimp takes the biggest pie when it comes to pricing and customer support.
In fact, it is one of the select few that provides free email automation.
Its “Forever Free Pricing” is likely the biggest magnet for the beginners – bloggers and marketers alike – who want to start with email marketing but without any hefty initial cost.

So, if you have picked Mailchimp, Kudos!!
Now let’s jump to the main topic…
How Does Email Automation Work?
It’s plain and simple.
You have a range of pre-defined criteria set that gets triggered when the prospect takes any particular action or an event takes place.
Say, you have a subscription box on your blog.
Now when someone signs up, you can use the automation feature of your email service provider to send them a welcome email immediately.
All you have to do is write a sweet welcome email beforehand and set the parameter which would push this particular email whenever someone joins your email list.
Check out this cool explanatory video by Ignite Visibility…
You can automate emails when you post new blog articles when someone buys your product, signup for the webinar, enroll in your course, before/during your product launch, and so forth.
Depending on your distinct needs and creativity, there could be tens and hundreds of email workflows.
Email automation also plays an important role in lead nurturing.
When someone joins your email list, your ultimate goal is to convert that individual into a purchasing customer.
You can send them pre-defined emails at a regular interval —
- introducing them to your brand;
- talking about their problems;
- talking about how your product/service solves such problems;
- then eventually pitching them your product/service.
The whole nurturing process can be done easily through automation.
Work one time to create a bunch of emails and then automate them.
If your content is effective and targeted, in the mix with proper segmentation, you can swiftly achieve your goals.
Needless to say, automation has plenty of perks.
Also Read: How to capture Email Address of (First-Time) website visitors
Benefits of Email Marketing Automation
It saves a lot of your time. Also, you don’t have to go through the manual work of updating your email list and emailing everyone every day in the right sequence.
All in all, it makes you more productive and efficient, improves your customer engagement, conversion, and retention.
Automate your message, pick the right trigger, and the drip campaign will work as and when people join your email list.
If you didn’t really understand much of how does email automation work, relax. You will know in the next section.
How To Setup Email Automation in MailChimp?
In May 2017, Mailchimp announced that it’s opening its marketing automation feature to all users. Previously, the feature was available just for premium users.
And just like that the company literally redefined the industry – at least for new bloggers and small business owners.
Now, everyone who has less than 2,000 subscribers can use Mailchimp marketing automation for free.
Coming to the major question, how to do it?
Well, follow the below steps — creating lists and campaigns is extremely easy once you get the hang of it.
Let’s divide the whole process into two parts for ease of understanding.
Also Read: 7 Free Ways to Grow Your Email List from Zero to 1,000 Subscribers
PART 1
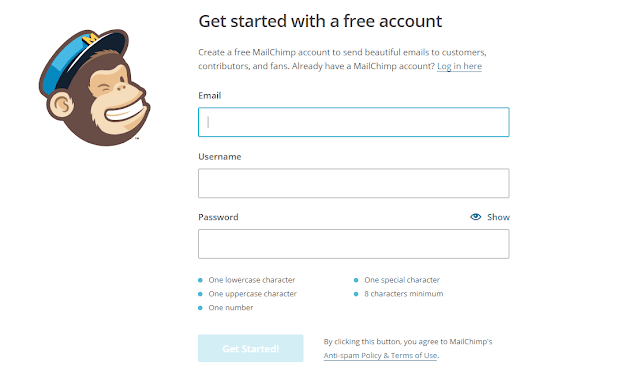
Step 1 If you haven’t already, create an account on MailChimp. It will take no more than 2 minutes.
Step 2 The dashboard/interface of Mailchimp is quite simple and user-friendly. This is what you will see once you have successfully logged in….
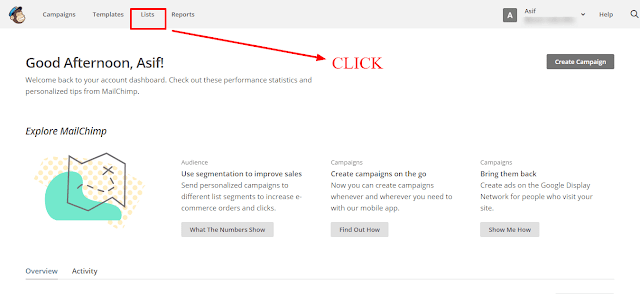
So first, you need to create a List of subscribers who would get your sequence automated emails. So click on the List tab at the top of your screen.
Step 3 In the next page, click the ‘Create List’ tab to create a new list where new subscribers will be added and who will get your drip emails.
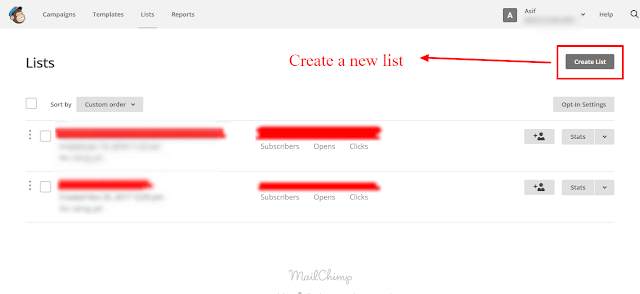
However, if this is your first automation campaign, to avoid any confusion, it’s always best to have a separate list.
Just create a separate list and then copy/move your existing subscribers to this list. And then create a campaign for this separated list.
Step 4 Create the list. Provide them the asked information carefully—like the name of your list, name, email address, and your address.
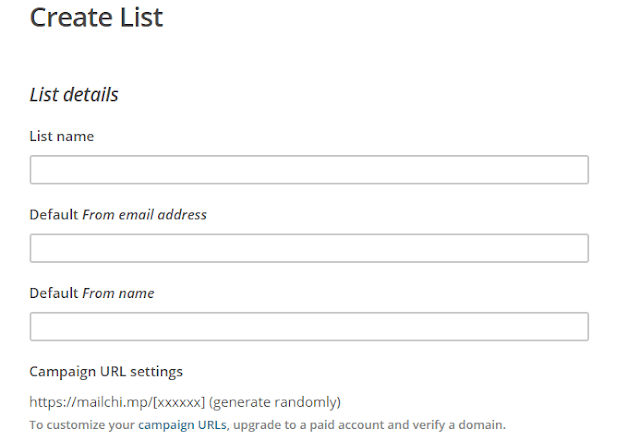
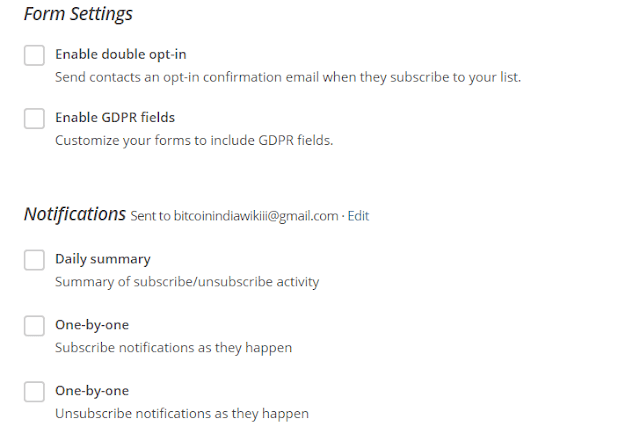
After you’re done, click on the Save tab. You have just successfully created your first email list. Now is the time to create your first sign up form.
Step 5 Go to your newly created List. And then inside, click on the Signup forms tab.
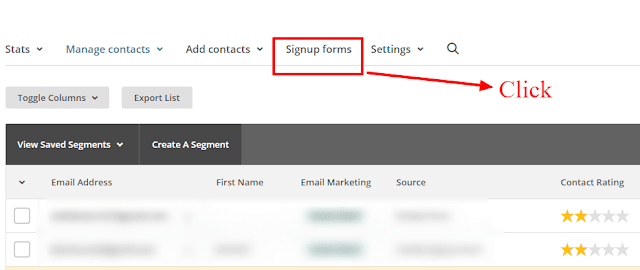
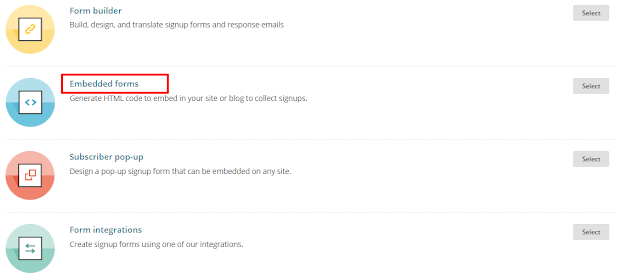
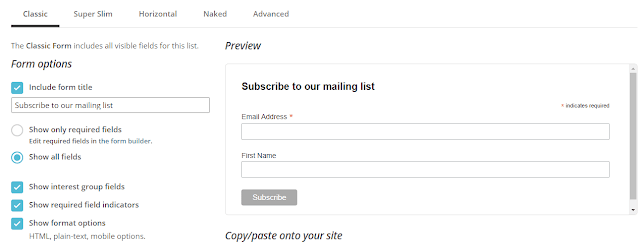
Once you have done everything, copy the pile of codes from the same page and paste it on your blog where you want the form to appear.
Now, whoever provides you their email through this form, their emails will go straight to this particular list.
PART 2
Now is the time to create an automated campaign.
Step 6 Create a Campaign!
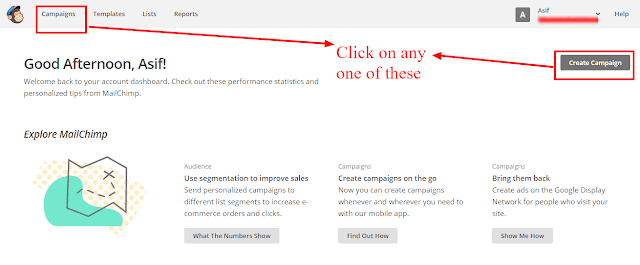
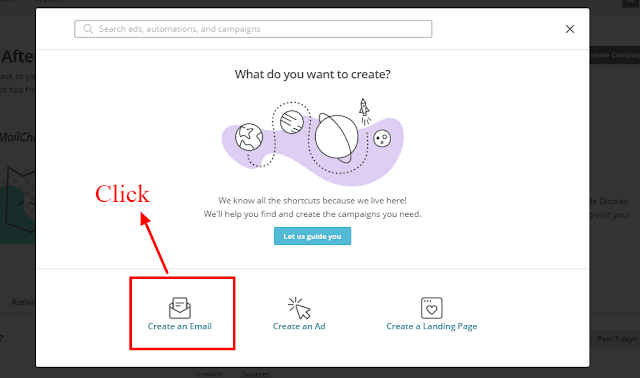
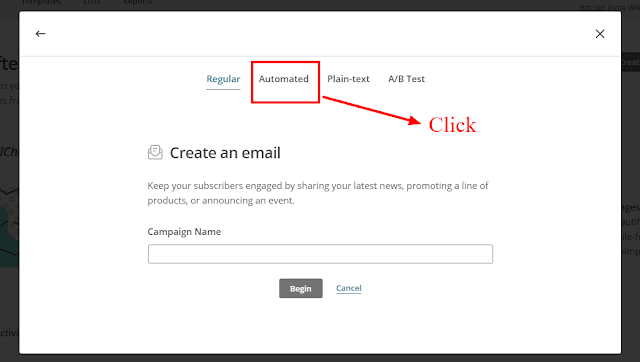
MailChimp provides ample of automation types and categories. (Know more)
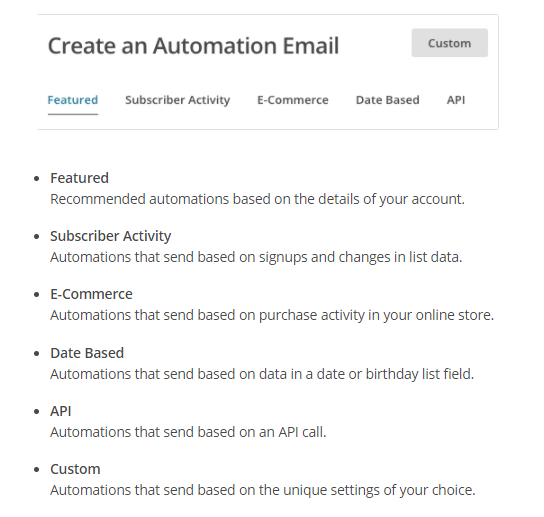
You can send a Thank You email to everyone who purchases your product.
Again, there are many triggers or automation options here. So the possibilities are seamless.
For now, let’s just create an automated campaign, under the ‘Feature’ head, to welcome new subscribers.
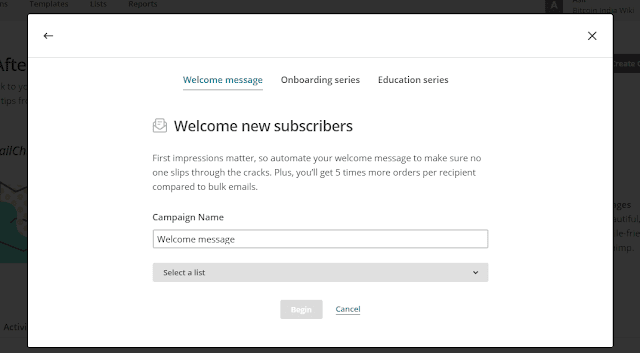
Step 7 Click on the “Welcome New Subscribers” tab.
On the next page, you will have to give a name to this Campaign. Also, you will have to choose the List you want to run this campaign on. Select the List you created in Step 4.
On the same page, you will also have to choose the Automation type, which includes the Welcome Message, Onboarding Series, and Education Series.
Here, we want to create an onboarding series where when someone signups up to a list, the person will get a series of emails at a definite interval of time that’s set by you.
So, in this step… choose Onboarding series, name your campaign and then select a List.
If you want to add more emails in the series, you can easily ‘Add Email’.
And if you want to have this series of just 2 or 3 emails, you can delete the remaining.
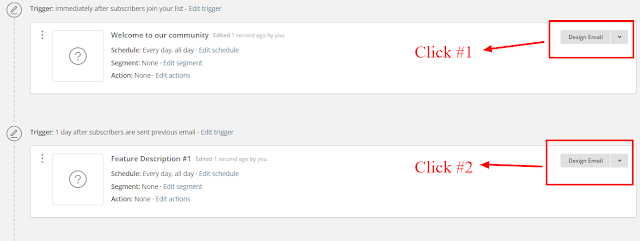
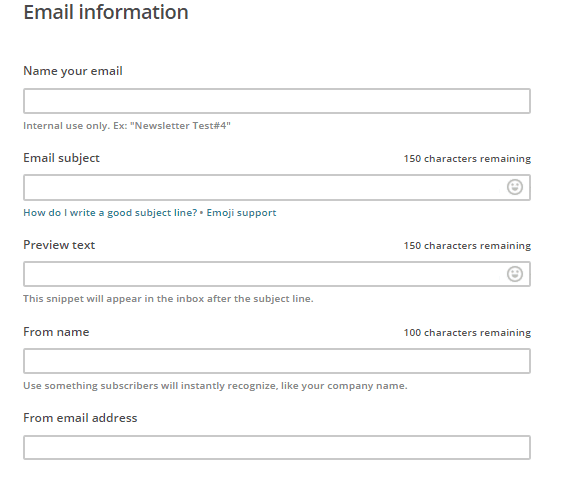
Step 9 The process of ‘Design Email’ will have three stages: Setup, Template, and Design.
In the first stage, provide all the asked information. This would include Email Subject, Sender’s Name and Email Address, and more.
Stick to the basic one. You would want to avoid your email look promotional and spam. So, the simpler, the better.
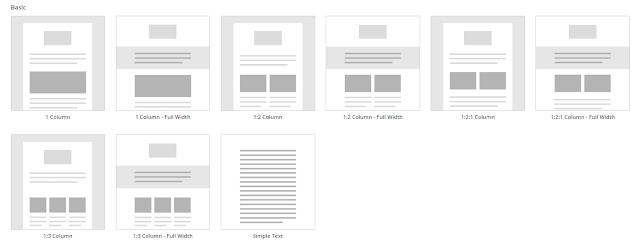
Paste your email body here. Add buttons, images and more.
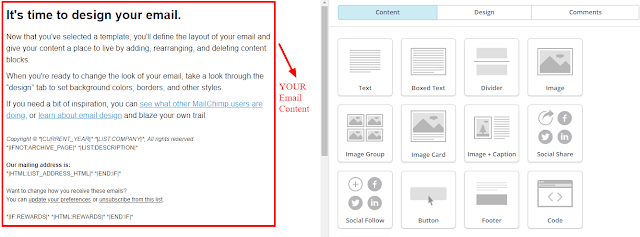
You can preview how your email would look on different devices of your recipients. Also, you can send a test email to your own email.
Once you’re done, click on ‘Save and Continue’. You will be taken back to the workflow page.
Step 10 You have created the first email of the series. Now repeat the same things as in Step 9 for all the emails you have in the sequence.
After you’re done designing each of your emails in the series, now you have to set up when they will be sent to your subscribers, i.e. when they will be triggered.
Step 11 In the same workflow page, you will find a ‘Trigger’ above every email in the sequence.
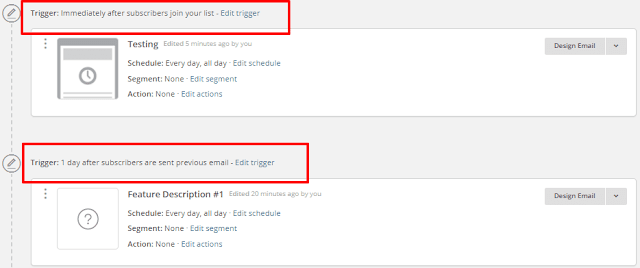
Generally, you would want to send your first email immediately after a person has signed up to a list. So keep it ‘immediately’.
Now set the trigger for the second and subsequent emails…
Whether you now choose to send after 1 Hour/Day/Week, the email will be sent to the subscribers after 1 Hour/Day/Week of the previous email.
So set the time of the triggers thoughtfully.
Make sure there’s a good interval of time between the emails to avoid looking like you’re spamming. But don’t leave any big gap between emails either—you don’t want subscribers to forget about you.
Remember, all these info and preference can be changed later at any time. So it’s okay if you don’t understand anything. You can return and make changes.
After everything is done, click on the ‘Next’ button.
You will see a final confirmation and summary of your automated campaign. If all looks good, click on ‘Start Workflow’.

THAT’S IT. Your campaign is live!
You’ve just taken the first step towards championing email marketing automation on Mailchimp.
Conclusion
Now as you go about, you will learn new things—how to optimally use this automation feature. You can run such campaigns to turn a cold, unknown subscriber into a purchasing customer and then a fan.
In fact, there are bloggers who run their entire online business on automation.
They have great content on the blog that captures email. Then they have a sequence of pre-written emails that get delivered to a prospect.
Through effective lead nurturing strategy and the power of such automation tools, the prospects eventually turn into a customer.
This whole process is called blog sales funnel, which is a whole different topic altogether for some other time.
As of now, cheer up. You have just learned how to do marketing automation.
Now, the learning curve here is quite big. But it’s also equally interesting. So keep exploring the different features of MailChimp, and see how you can improve your automated email campaigns.
Recommended Read: Ultimate Email Marketing Guide 2019 (Beginners + Advanced)
If you need more help, tweet to Spell Out Marketing. Click here to Tweet. You can also email me. I would love to help! 🙂
